A very long time ago in what feels like a different lifetime at this point, I took the Sierra Club’s Wilderness Travel Course in Southern California. It is a legitimate, volunteer-taught mountaineering program in the Angeles Chapter, and it does not mess around. Somewhere in the middle of it, everyone around me seemed to be catching on to baseplate compass navigation faster than I was. I sat with the book, walked the diagrams, tried to hold the concepts in my head, and felt like Rain Man in a room full of people who seemed to absorbing the material by way of osmosis. I weas genuinely embarassed that I wasn’t catching o the way others were. Then, on a summit day somewhere in the San Gabriels, it clicked. Not because I had a breakthrough. Because I had done it enough times.
That is the short version of every honest compass story I have heard since. Nobody looks at a baseplate compass, reads the instructions, and just gets it. You use the thing on real ground, over and over, and one day the concepts stop being three separate ideas and become one continuous motion.
I am writing this from a slightly odd vantage point. After nearly a decade of sedentary life I recently got back into hiking and summiting, which meant relearning navigation because the skill is genuinely perishable aka use it or lose it. Along the way I decided to also pick up the military side of land navigation, because the precision and the meticulous planning appealed to me in a way REI-flavored day-hike navigation never quite did. So this article is the version of the compass basics I wish someone had handed me the day I signed up for that mountaineering course. It is Block One of a series that will eventually cover map reading, declination in depth, terrain association, dead reckoning, lensatic compass work, and the full military planning approach. But you have to start here.
The Three-Step Silva Method
Baseplate compass navigation from map to field is three steps. This is the method Silva itself teaches, and it is the one drilled into every course I have ever taken.
- Lay the edge of the compass baseplate along the line from where you are to where you want to go, with the direction-of-travel arrow pointing at your destination.
- Rotate the bezel until the orienting arrow and orienting lines point to north on the map.
- Pick up the compass, hold it level in front of you, and turn your body until the red end of the magnetic needle sits inside the outline of the orienting arrow. The direction-of-travel arrow now points at your destination.
That is the whole method. If you memorize nothing else from this article, memorize those three steps. Every technique that follows is a refinement or expansion of one of them. Now let me actually explain what each part does and why it works.
Know Your Compass Parts
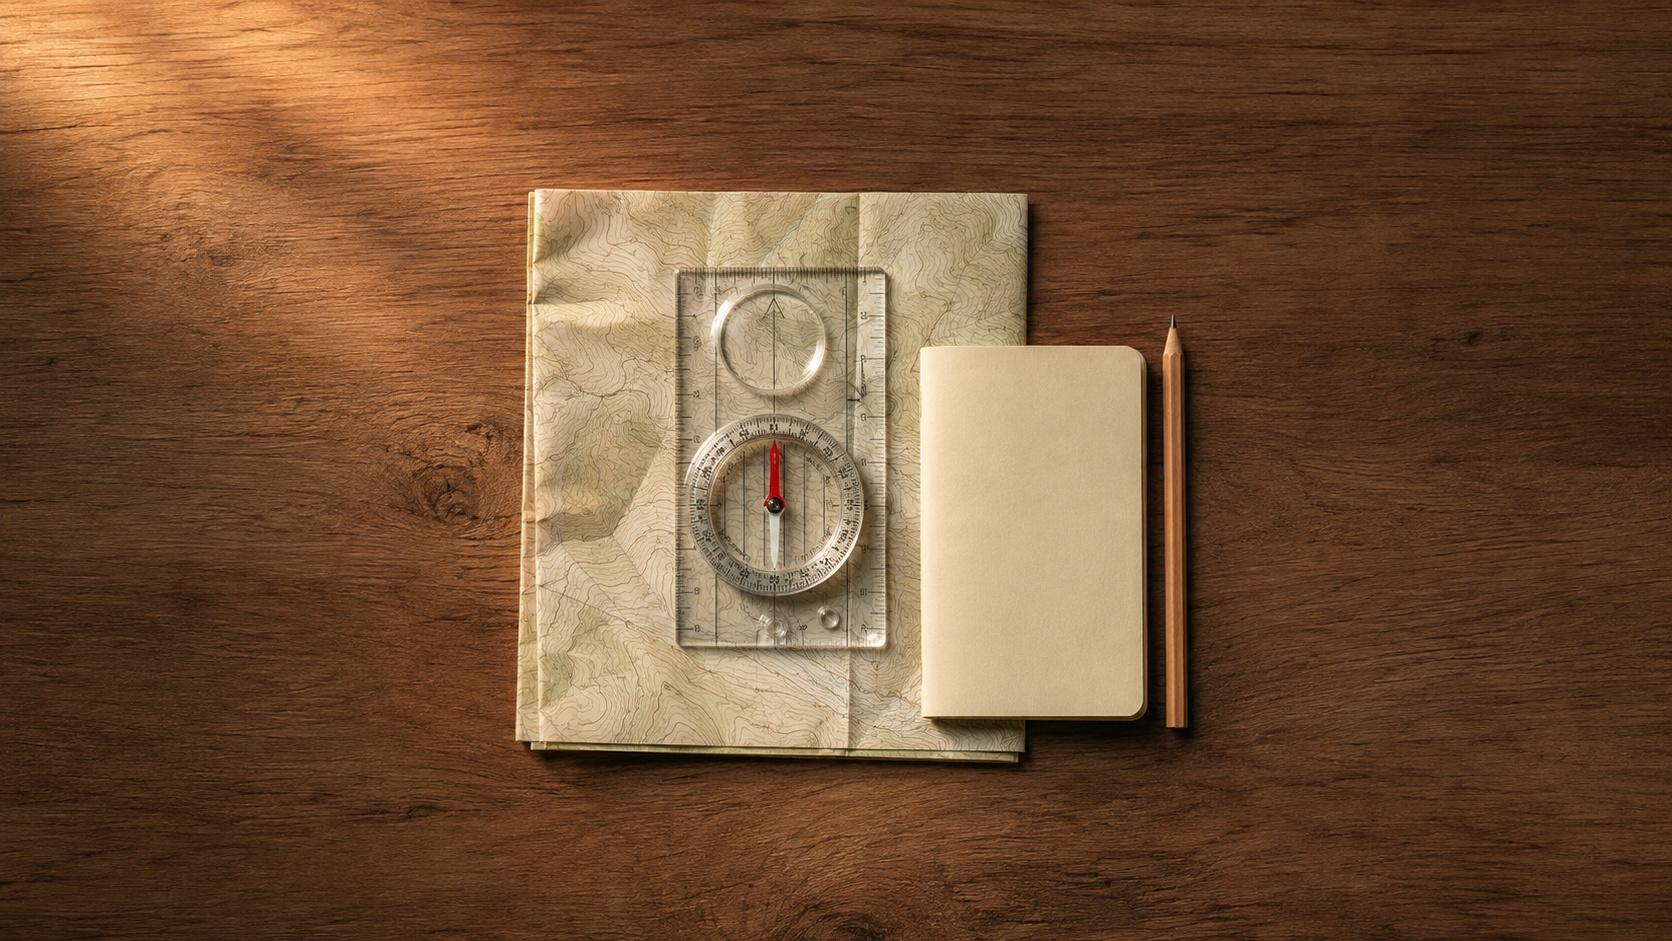
Before we open up the steps, a fast tour of what you are looking at. A baseplate compass has more moving parts than people expect, and the words for those parts are how the rest of this article is going to talk to you.
The baseplate is the clear plastic rectangle everything else sits on. It has straight edges, which matter because you use those edges as rulers on your map.
The direction-of-travel arrow is printed on the baseplate itself. It points away from the compass, in the direction you eventually want to walk. This is the arrow you follow with your body. It never moves.
The bezel is the round rotating dial with degree markings around its edge. You turn this to set a bearing.
Inside the bezel is the orienting arrow, sometimes called the shed, along with parallel orienting lines. These rotate with the bezel and are what you line up against the map’s north-south grid.
The magnetic needle floats free inside the capsule. The red end always points to magnetic north, no matter which way you turn the compass body. Your job is never to follow this needle directly. Your job is to line it up inside the orienting arrow so the direction-of-travel arrow ends up pointing where you want to go.
Beginners follow the red end of the needle and end up walking north forever. Do not be that person. The needle is a reference. The direction-of-travel arrow is your instruction.
Step One: Line Up Your Map
Lay your map flat. A car hood works badly because metal interferes with the needle, so use a stiff map case, a flat rock, or your knee.
Find your starting point and your destination on the map. Place the compass on the map so that one long edge of the baseplate runs through both points, and make sure the direction-of-travel arrow is pointing toward the destination rather than back toward your starting point. This part sounds obvious right up until you do it backward once and walk two miles the wrong way, so double-check it.
If your destination is farther away than your baseplate is long, use the edge of the compass as a straight line and mentally extend it, or lay a straight edge along the same line and slide the compass into position along it.
The compass is now sitting on the map like an arrow pointing from you toward where you want to be. Everything you do next is about transferring that direction from the map into the real world.
Step Two: Set Your Bezel
Without moving the baseplate, rotate the bezel until the orienting arrow and the parallel orienting lines inside it are pointing to the top of the map, which is north on the map, and align with the vertical grid lines.
You have now stored a bearing on your compass. The exact degree reading where the direction-of-travel arrow meets the bezel is your bearing to the destination. Some people write this number down. On a short leg you can just leave it set on the bezel and go.
Here is the part almost every simple tutorial glosses over, and it matters. The north on your map is not the same as the north your needle is pointing at.
Your map is drawn to true north, the geographic top of the planet. Your compass needle points to magnetic north, which is a different location that also moves slightly every year. The angular difference between the two, from wherever you happen to be standing, is called declination. In some parts of the country the difference is only a few degrees. On the West Coast and in Alaska it can be twelve to fifteen degrees or more. Over a mile of walking, an uncorrected fifteen-degree error puts you a quarter mile off target. Over five miles, you are more than a mile off. This is how people get lost with a working compass in their hand.
There are two ways to handle declination. The clean way is to buy a compass with an adjustable declination setting, which lets you dial in the local variation once and forget about it. The Suunto MC-2 and the Silva Ranger both offer this. The manual way is to add or subtract the declination value every time you transfer a bearing between map and field. The mnemonic is east is least, west is best, meaning easterly declination is subtracted and westerly declination is added when going from map bearing to field bearing.
You can look up your local declination on the NOAA website. Write the number on your map with the date, because it drifts a little each year.
Step Three: Walk Your Bearing
Pick up the compass. Hold it flat in front of your body, at about belly-button height, with the direction-of-travel arrow pointing straight ahead of you like a rifle sight.
Turn your body, not the compass, until the red end of the magnetic needle sits inside the outline of the orienting arrow. There is a phrase for this in the outdoor world: put the red in the shed. When the red end of the needle is boxed inside the orienting arrow, your direction-of-travel arrow is pointing exactly toward your destination.
Now stop staring at the compass and look up. Find a distant landmark that sits on the line you need to walk. A specific tree, a boulder, the notch between two hills, whatever you can identify from a distance. Walk to that landmark without watching the compass the whole time. When you reach it, take out the compass, put the red in the shed again, pick a new landmark, and repeat.
This is called handrailing off landmarks, and it is how anyone who is good at this actually moves through the field. The compass is a reference you consult, not a screen you watch. If you try to walk while staring at the needle you will drift, trip, and hate your life.
If the terrain is featureless enough that no distant landmark is visible, like heavy forest or fog, you can leapfrog with a partner. You aim, they walk ahead until they are almost out of sight, you wave them left or right until they are exactly on your bearing line, then you walk to them and repeat. Old technique. Still works.
Using a Compass Without a Map
Sometimes you need to hold a direction without any map involved at all. Maybe the map is packed away, or you are trying to walk out of somewhere in a specific compass direction to hit a road or a river you know is to your east.
The method simplifies to two steps. Rotate the bezel until the number of degrees you want to travel sits at the direction-of-travel index. Then hold the compass in front of you and turn your body until the red end of the needle sits in the orienting arrow. Walk that direction, checking every so often.
This is also how you hold a bearing to walk back the way you came. If you walked out on 90 degrees, walking back means adding 180 and walking on 270. This kind of dead reckoning is a real skill on its own, and it earns a full article later in this series. For now, the point is that a compass is useful even when you have no map, as long as you know one direction that matters.
Common Beginner Mistakes
The failure modes are predictable enough to name.
Following the red needle instead of the direction-of-travel arrow. You will walk north. The needle is a reference. Follow the baseplate arrow.
Holding the compass at an angle. The needle needs to float level. If you hold the compass tilted, the needle drags against the capsule and gives you a wrong reading. Hold it flat.
Standing next to metal. Belt buckles, watches, car hoods, rifle receivers, and metal fence posts all deflect the needle. Take a step or two away from anything metallic before you shoot a bearing.
Forgetting declination. Already covered. Do not skip it because the number seems small. Fifteen degrees over five miles is more than a mile off course.
Assuming north on the map is up. Usually it is. Not always. Always confirm which edge of the map is north before you set your bezel.
Trusting one bearing over a long distance. Compass work stacks small errors. Every mile you walk without re-shooting a bearing, your error grows. Re-shoot at every distinct landmark.
Choosing Your First Compass
You can spend fifteen dollars on a compass. You can spend eighty. There is a real difference, and I want to explain what you are actually paying for.
I have used a Suunto MC-2 for years. It has a mirror lid with a sighting notch for taking precise bearings on distant landmarks, an adjustable declination scale, a global needle that works in any hemisphere, and build quality that has held up through a decade of use. It costs around eighty dollars new and it is the one I recommend if it’s not going to set you back in any meaningful way.
The Silva Ranger is the same class of tool. Silva invented the modern liquid-filled baseplate compass, so their reputation is baked into the category. Similar features to the MC-2, similar price range, similarly durable.
The Brunton TruArc 3 is the reasonable step down. No mirror, no sighting notch, but it does have adjustable declination and a real orienting arrow. It runs around thirty dollars.
Below thirty dollars you are usually looking at compasses without adjustable declination, without proper orienting arrows, or with cheap capsules where the needle sticks and settles slowly. I own one of these for comparison purposes and the difference in a real field setting is not subtle. The cheap one drags. The needle settles inconsistently. The bezel is stiff enough that you nudge your bearing every time you turn it. You are not going to notice these problems on your kitchen table. You are going to notice them at hour three of a hike when precision matters and your patience is thin.
If you are going to use a compass twice a year on marked trails, a cheap one might do fine. If you are going to use it in real navigation, buy the good one and be done with it. This is a tool you keep for decades.
Your Next Waypoint
The U.S. Army’s field manual on map reading and land navigation, which I finished re-reading last week, describes what it calls a building-block approach to teaching this skill set. Level one is basic map reading and dead reckoning. Level two adds terrain association. Level three adds problem-solving under load, like real-world route selection. Level four is tactical planning. Each level assumes proficiency at the ones below it. You cannot skip.
That framework is exactly how I am building this series, because it happens to match how the skill actually develops. What you just read is Block One. Baseplate compass, three steps, one map, one direction, one destination. If you get out and use the method on real ground a few times, this will start to feel automatic, the way it did for me on that San Gabriels summit day.
From here, the series is going to build outward through the pieces that make Block One useful in more situations. Reading a topographic map properly. Declination in real depth, not just the shorthand version. Terrain association, which is how you keep your position honest without constantly shooting bearings. Dead reckoning and pace count for holding a heading in featureless country. Lensatic compass technique for the readers coming from a military background or curious about that tool. Land navigation planning for building a real route in advance instead of improvising at each waypoint. Each block gets its own article. Each one builds on the block before it.
I will note something that has always bothered me a little. The outdoors community can be strangely tribal about whose approach is the right one. Hikers dismiss the military stuff as cosplay. Tactical folks dismiss REI-flavored day-hiking as soft. It is all silly to me. We are all outside, we all want to come home the same day we left, and the toolkit is bigger than any one tribe uses. This series pulls from both, without apology for either. If that reads as quixotic, so be it. I think we are all closer than we act like we are.
One last thing worth stating outright. Compass navigation is a perishable skill. That word gets used constantly in this space because it is exactly the right word. If you learn this today and never touch a compass for a year, you will have to relearn most of it. If you use it a few times a month, even briefly, it stays sharp. The way to keep it is to keep doing it. Take a compass on your next hike. Shoot a bearing off a peak you can see. Compare it against what the map tells you. Do that four or five times and the abstract concepts turn into muscle memory that lasts.
If you want the fuller intellectual companion to this skill, the standard reference is Mountaineering: The Freedom of the Hills, currently in its ninth edition, published by The Mountaineers. I still have my old paperback copy, and I recently discovered the newer edition is available on Kindle, which is a small mercy for aging eyes that would rather not fumble for reading glasses in a tent. It covers vastly more than compass work, but the navigation chapters have taught more people this skill than any single resource I know of.
That is Block One. Go find some ground.
Frequently Asked Questions
Do I really need to learn a compass if I have a GPS or my phone? Yes. Batteries die. Screens crack. Signals drop in canyons and dense forest. A compass and a paper map work in any condition and never need charging. Rescue workers have a name for people getting lost with a working GPS in their hand: death by GPS. Treat the compass as your primary navigation tool and the GPS as the backup, not the other way around.
How long does it take to learn to use a compass? The concept takes about half an hour to read. The skill takes real field practice to internalize, usually over the course of several outings. Expect to feel awkward the first two or three times you actually use it on the ground. That is normal and it is not a sign you are bad at this.
What is the difference between a baseplate compass and a lensatic compass? A baseplate compass is the clear rectangular kind covered in this article, designed to be used with a paper map. A lensatic compass is the folding metal-bodied kind used by the military, designed for taking precise bearings on distant objects. Both work, and they are used slightly differently. The lensatic compass will get its own article in this series.
Do I need to correct for declination on every hike? If your area’s declination is more than about three or four degrees, yes. In the United States, that means everywhere except a narrow band running through the central plains. Look up your local declination once on the NOAA website and either dial it into an adjustable compass or note it on your map.
Why does my compass needle spin when I hold it? Usually because it is sitting near metal. Move away from your car, belt buckle, or any large metal object. Also make sure you are holding the compass flat rather than tilted, since a tilted compass causes the needle to drag on the capsule.
Can I use a compass in the Southern Hemisphere? Only if it has a global needle, which is a feature on higher-end compasses like the Suunto MC-2. Cheaper compasses are calibrated for one hemisphere and will drag or fail to settle if you use them in the wrong one.
Is a smartphone compass app the same thing? Not really. Phone compasses use magnetometer sensors that are less precise than a real compass and can be thrown off by nearby electronics, magnetic cases, or even the case’s own magnets. Also, when your phone dies, so does the app. A real compass needs nothing but the Earth’s magnetic field and works forever.
What is the best compass for beginners? A Suunto MC-2, Silva Ranger, or Brunton TruArc 3 will all serve you well for decades. If budget is tight, the TruArc 3 at around thirty dollars is the least expensive option worth owning. Below that price you start getting compasses that will teach you the concepts poorly because the tool itself is unreliable.
About the Author